Importing Video Into Premier CC
So far we have learned to Copy still images from your camera card into a folder on your computer or flash drive. We did this using Lightroom's Import dialog. Now we need to go through a similar process to Copy your video files onto your computer or flash drive.
Step 1:
For each video project you should start by creating a folder where you will keep all your assets. (For example: Sound & Stills - Sweitzer, VideoSequence-Sweitzer or FinalProject-Sweitzer)
Step 2:
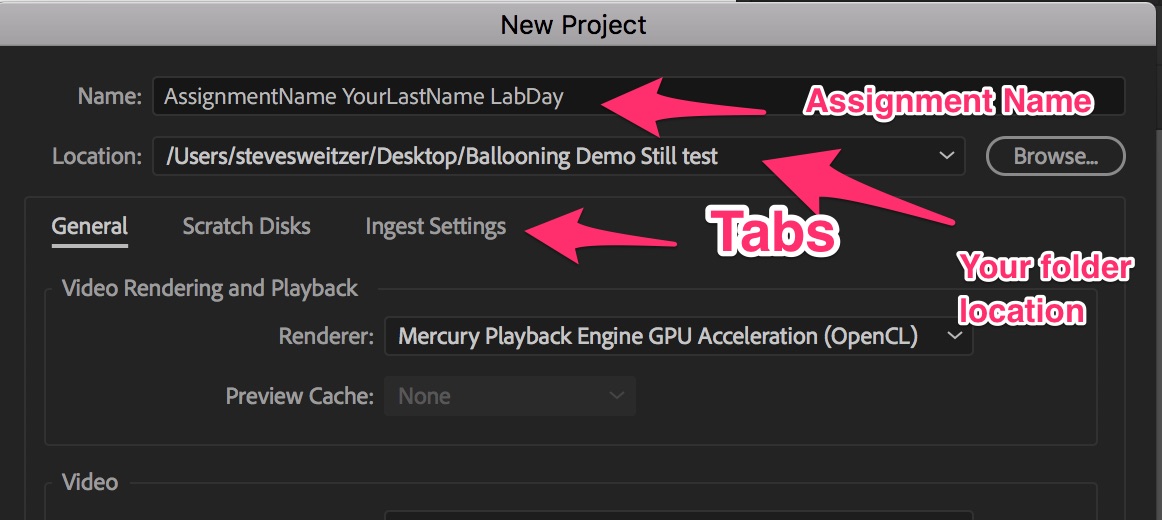
Launch Premier, choose “New Project" from the options. At the top of the screen that opens, in the Name file box, enter the appropriate name for the project:
Sound & Stills YourLastName Tu or Th
Video Sequence YourLastName Tu or Th
Final Project YourLastName Tu or Th
Right below the Name is the Location where your files will be stored. You want to store this project in the folder you created in Step 1. Click on the Browse button and navigate to that folder. Click on OK.
Step 3:
Click on the File menu and choose New Sequence and in the resulting window, name your Sequence:
Sound & Stills YourLastName Tu or Th
Video Sequence YourLastName Tu or Th
Final Project YourLastName Tu or Th
And click OK.

Step 4:
Click on the Scratch Disk Tab and be sure they all say "Same as Project."
Step 5:
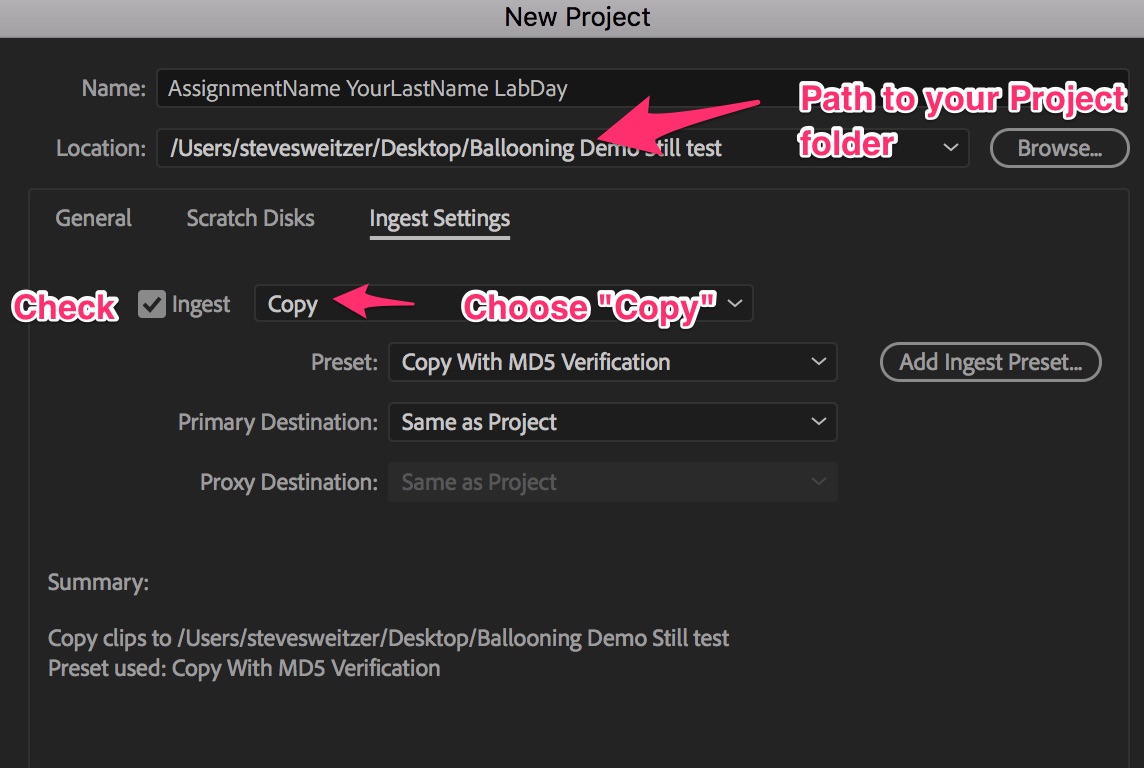
Click on the Ingest Settings tab.
Be sure there is a check in the
Ingest box, make sure Copy is selected and make sure the path is set to the folder your created in Step 1. 
Click on OK and Primer CC should finish loading.
Step 6:
Click on the Window menu and choose Workspace/Editing - this will open the various windows in a layout similar to the one you used for your Tutorials.
Step 7:
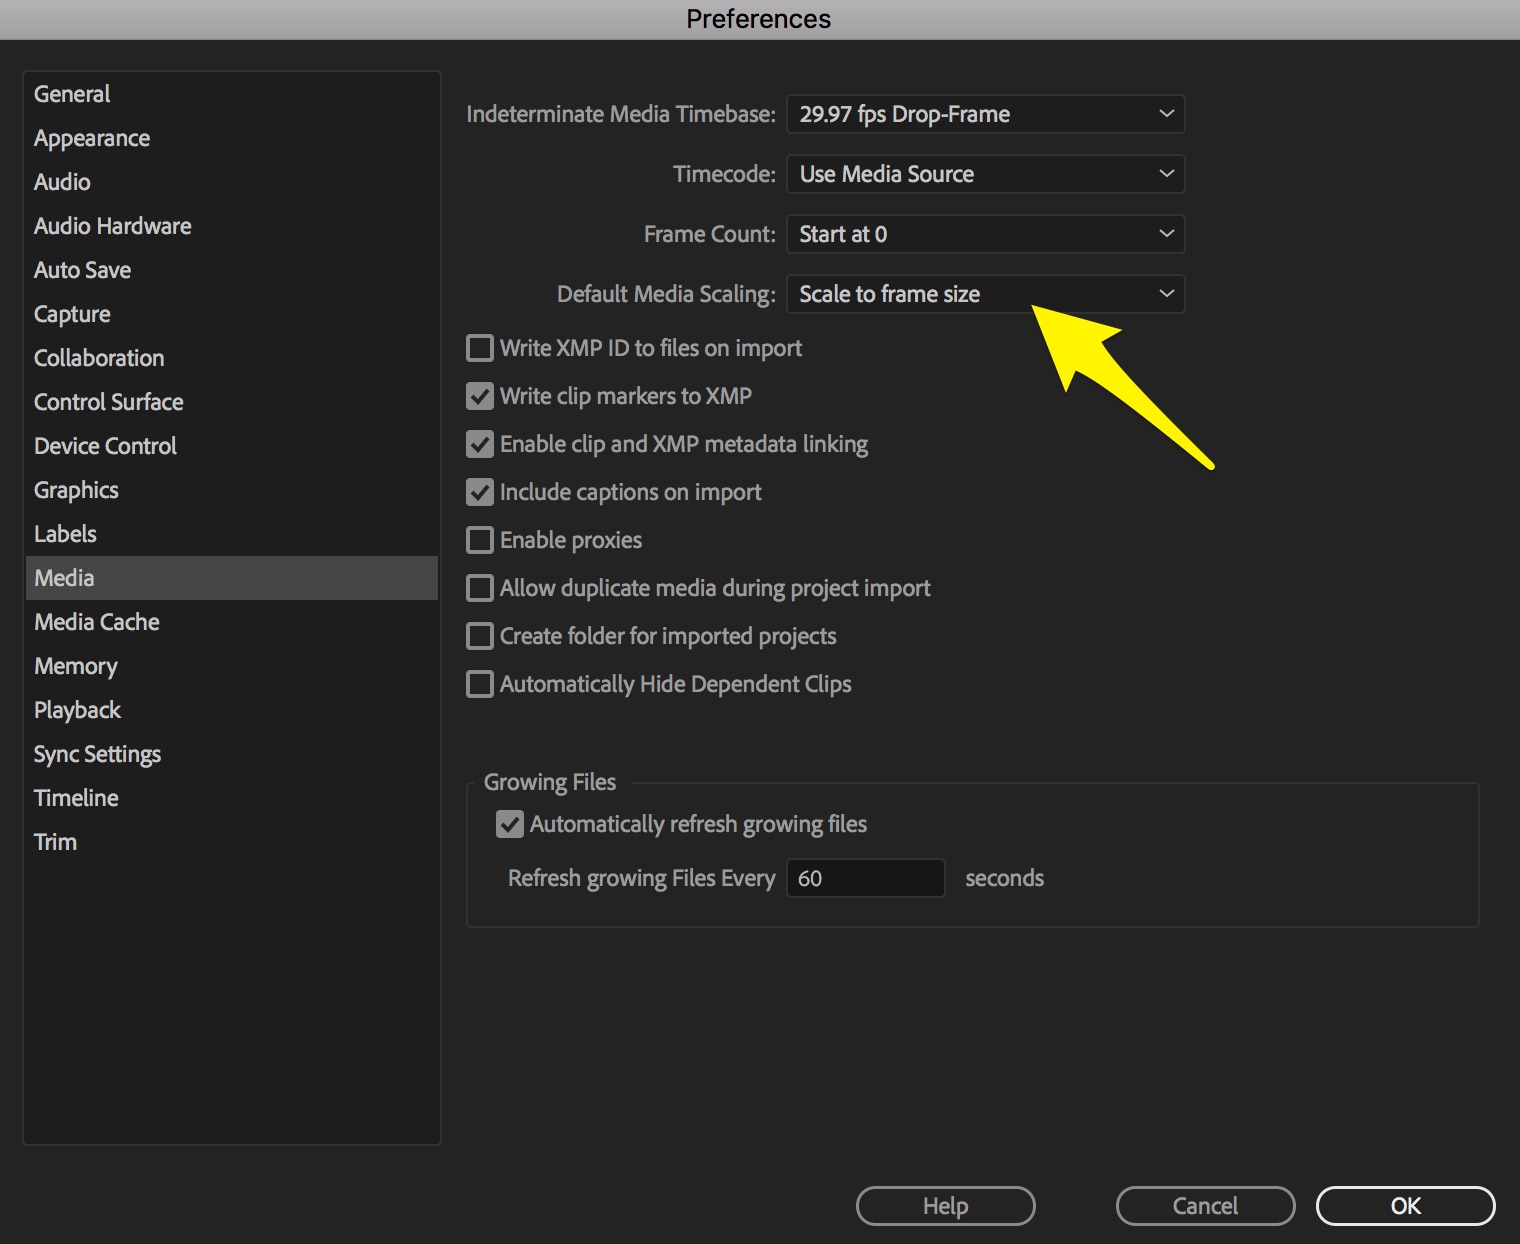
Click on the Premier Pro CC menu in the upper left of the screen and choose Preferences/Media and use the drop down window next to Default Media Scaling and choose Scale to frame size.

Step 8:
Choose the File menu and choose Import
and navigate to the video folder on your camera's card. This may be a little tricky because each camera organizes their files differently and they give the video files different suffixes. (They will probably be one of these:AVI, FLV, WMV, MP4, and MOV.)
Step 9:
Choose the File menu, choose New, choose Sequence and name the sequence:
Sound & Stills YourLastName Tu or Th
Video Sequence YourLastName Tu or Th
Final Project YourLastName Tu or Th
Step 10:
When you finish editing your video you MUST export it. Export Video This process makes a movie that I can grade. I can NOT grade a file that ends in .prproj.
